Pages

Tuesday, February 25, 2014

Toy Hacking in New Orleans


Toy Hacking can be all consuming, that's for sure, but what fun. Since I took all my toys to Good Will before I moved into the bus, I had little to work with. No Good Will stores nearby, but aha a Dollar General. Rounded up a few toys with potential and came up with this Toy Hack. 


Deconstructing was great to do "after" a circuit unit. I understood what was happening and imagined the parts I could not control (like the song being played) .

I appreciated the programming in the Toy Phone which had both English and Spanish, and lots of conditionals (including a built in Quiz)

One of the toys appeared not to work, but after swapping out the watch batteries from another toy, we discovered it was the batteries and upon further deconstructing discovered the switch was stuck on ON (thus the drained batteries).

After I got everything apart I started to imagine possibilities. In playing with possibilities, I managed to dislodge some wires, which gave me the opportunity to learn to solder. Lucky me, I had a great teacher nearby who let me use his tools.

This got me to reflect on the importance of having access to resources (both tools and people) to support your process. Also important is a person who notices when you've reached capacity and encourages you back on your journey to a point where you have the desire and confidence to keep going. After all the tools were put away and we were working on some decorative elements, Mr. Potato Head's light up nose, stopped working - didn't take me long to spot that one of the wires had broken on the switch. ;-( By that time it was late at night, I had worked all day on this, and didn't have any stamina left for this 'slight' setback. Although Craig had left me to my "inventions" most of the day, he was within earshot and stepped back into the picture long enough to get my spirits up again, and offered to take out the solder so that I could "practice my new skill". ;)

A school environment does not lend itself well to the extra time mishaps take to fix. And many kids do NOT have mentors outside school that could lead them through this type of learning. When I read the Steve Jobs biography, I learned that Steve's adopted father was a tinkering and set up many opportunities for Steve to feel empowered as he learned to control computing devices. Where is that opportunity for our kids today?

To me creating these type of opportunities provides a common goal for schools and community to work  for together on.  I'm glad to see the interest in "making"  come to the surface again.   I think its a sign that our society is try to correct its path after having wandered too far off course.   
Time to  make to learn, invent to learn, and play to learn. 

Tuesday, February 11, 2014

I See the Light - Exploring the world of Microprocessor Circuits


I See the Light - Exploring the world of Microprocessor Circuits
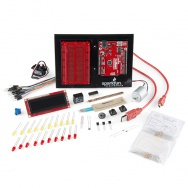
My learning journey in the world of physical computing continues to bridge the experience gap for me as I complete the 15 circuits from the the SparkFun Inventor’s Kit for the SparkFun RedBoard.


As I worked through these circuit building exercises from my Intro to Physical Computing Course from Marlboro College Graduate and Professional Studies, I became more deeply aware of how the experience gap widens as kids miss out on the opportunity to learn some basic science about the world around them.  I’m not sure when budding scientist usually get introduced to circuits, but I don’t remember it from my elementary school days.  It certainly didn’t happen in my household of 5 girls.  I don’t have any memories of doing this type of thing with my parents either. So by the time I got to high school, I found myself accepting the fact that my understanding of the world of science was “muddy” and learned to live with that and cope.  I put off taking Chemistry until my senior year, and then used my ability to ‘play school’ well to get through that without any deep understanding.  Needless to say, I never made it into any physics classes.  


I was pleased to learn that my science/math distribution requirements in college could all be fulfilled with math classes, which offered me yet another way to stay in the dark with my understanding of science.  Ironically  I am fascinated by science and frequently in awe of engineering, but I’ve learned to accept that this is something I can enjoy the marvels of without ever being able to do it (or truly understand it) myself.  After all, we can all enjoy music without being able to play an instrument or art without being able to draw or paint -  so it must be with science.  Maybe!  But by curiosity always made me wish I could have had a deeper understanding of so many wonders that could be explained by science.  I learned to accept the fog--which of courses increased the gap in experience and in understanding. [photo credit: doug.siefken via photopin cc]


As I proceeded through the first couple of projects in this Inventor Kit, I had a real meltdown.  Circuit 1 was pretty easy to put together. But as I was completing Circuit 2, I became very aware of my lack of any deep understanding of what was happening outside my ability to follow directions and assembling wires and components accordingly. The tension made me want to shut down and not move further.  There was no way that I would be able to complete the next 14 projects feeling this incompetent. So I took a step back and did what I usually do when I feel over my head - and that is to become a student and tune into my learning style.  I copied the code to the circuits into a Google doc and started to break it apart 1 line at a time, using yellow to highlight important concepts, orange to highlight any actual snippets of code as I dissected it, and pink to  highlight any points of confusion that remained.  The comment feature allowed me to add free form thoughts and ideas as I worked through the circuits.


But that was not enough.  I was seriously lacking some very basic basics.  Thankfully my husband is an engineering type and was more than willing to help me fill in the gaps.  After some of the fog had lifted about the basics of circuits and circuit boards,  I went back and redid the first project and moved through the next several projects with increased confidence each time.


By circuit 3 I was able to look at the little schematic and understand what was going to happen, even before I turned the page and read on.  I found myself color coding the wires I selected according to the energy flow and polarity.  Anything that went to + or 5 volt got a red wire.  Anything that went to ground got a black or white wire.  Wires back to certain pins got a different color.  As my confidence and understanding grew I started playing with positioning the wires and resistors in locations that worked for me that would yield the same results. I ran into another challenge when I hit the project that introduced transistors and relays. My curiosity and unwillingness to wander in a state of fog lead me to grill my coach/mentor/husband once more until things became clear enough for me to have a basic understanding of the role of transistors and relays in circuits.  


I completed a video of each circuit as I completed it.  Explored it further by playing with the code and then sailed through most of them (except 14 - which gave me a real hard time).  Here is my documentation.


I had 3 circuits to complete by the time we had to leave Grayton Beach, Florida on Monday, but I managed to complete and shoot the video documentation for those last 3 circuits on the road while we travelled from the Florida, through, Alabama, Mississippi and Louisiana.


Throughout this wonderful learning opportunity, I found myself thinking about the importance of  Curiosity, Confidence, GRIT, Motivation and understanding your learning style.  Had I not had the curiosity, I would have never sought out this experience; had I not had the motivation and GRIT, I would have given up; had I not had the understanding of my learning style, I would have failed to see a way through the challenges and had I not gained confidence along the way, I would not have enjoyed any of it, nor built any desire to explore further.


In education today, we are doing more and more student centered learning, and offering students more choice in determining their learning path. But what does it take to create the curiosity, confidence, motivation for students to venture into unknown territories or discover areas of knowledge that might never cross their natural path? What if a desired path leaves you in the dark lacking major understanding of what is and what’s possible in our world? How can we move forward in the personalization of education without failing our children?  Providing access and opportunity to learn is not the same as providing students with the ability to reach beyond where their natural path or choices might take them.  My choices left me void of understanding of many scientific concepts.  But should my educational system have allowed this to happen? [ photo credit: Auntie P via photopin cc}]


Some would say this is why we have high stakes testing - to spot the failures and fix them.  But is that fixing the problem or making it worse. Not only do these test not reveal much data about Curiosity, Confidence, GRIT, Motivation and understanding one's learning style, they don’t yield improvements in the design of learning that increases any of these essential components. Often, they have done the opposite in that they have brought about an increased focus on remediation at the expense of creative learning environments that challenge learners to wonder, take risk, construct knowledge, and persevere. Finding a path where learners can experience that joy of thinking hard, where they have choice, follow their passions, and unpack their own understanding of the world without missing important and key understandings will not be easy - especially in a world where knowledge is growing at an exponential rate.  Thankfully people are still asking the important question of “How do we do this.. where is the path that will yield the best results?”  [photo credit: NASA HQ PHOTO via photopin cc]


Tuesday, February 4, 2014

A New Part for the Bus


The success I experienced at a getting a playful artifact printed on a 3D printed lead to the modeling of more practical piece to be printed.

The 30 year old vintage bus we live and learn is lacking some pieces on each screen, that keep it in place in the tracks.  They no longer make the part, so our 3D printing assignment led me down the path of getting a replacement part modeled and printed in 3D.


I started by using 1233Dcatch to see if I could get accurate enough dimensions to design it myself.


I learned that getting a good 3D scan is not that easy, but it was a great experience.

After realizing that the precision and curves of this part would require more experience and better tools than I had access to,  I decided to send my modeled file to  someone who could give me an estimate on getting a more precise model of the part I modeled and getting it printed in a substance that could withstand the tension that moving a screen back and forth on a track would produce.

Johnny from Delray, whom I discovered on  from Makexyz  modeled the part, printed it,  and provide us with the STL file for $30.   You can view it in 3D here.


 He quoted us an additional price if we wanted 10 more  of the same part.  We have decided to test it for a while.  The little knobs broke off when we put the part in the window, but they don't impeded the part from doing the job of keeping the screen 'intact' on the track.   We are thinking that the part needs to be printed with a slightly more flexible material.


Upon the recommendations of my classmates in Intro to Physical Computing, I've decided to try to have the part printed at Shapeway since they had a wide variety of materials to choose from. We've ordered 5 copies which comes to about $17.00 (with shipping).


Johnny's story is an interesting one so we asked him if we could interview him.  This interview is a great inspiration of a young man who had an idea and thought himself the skills he needed to make his idea a reality.  He has no formal training in 3D printing, but wanted to create a prototype for an invention.  He not only taught himself the skills, but also brought a 3D printer to create the prototype.
  He currently has a patent pending on the kitchen gadget that he invented. That is what I call a real Maker.


Saturday, January 25, 2014

Maker 'STUFF"


In Chapter 8 of Invent to Learn,  Stager and Martinez offer a long list of stuff that a maker space should have for students to tinker with, design, or solve problems.  The one part of the list that could easily get looked over is 'arts and craft' materials.   You should ABSOLUTELY not skimp on these.

I would advocate that the Maker Space needs to be filled with  lots of colorful materials along with arts and craft stuff.  Don't limit your maker space to mechanical stuff  and electronic stuff.  The Google Maker Space - The Google Garage pulls you in and spews of creativity.  I would love all maker spaces to look like this.


The maker lab can be a real turn off to some who would benefit from it.
Also the Maker movement would benefit from some whom they might never attract.

I'm thinking of artistic students who are are attracted by color, shapes, textures.
I'm also thinking of female students who might not see themselves as a maker nor interested in the types of products they might associate with tinkering and making.


One of the things I still own is a set of Pico Crickets and all the idea cards that come with them.  They were amazingly effective in getting girls to 'make'.   Every year for summer camp  I would round up all types of colorful and unique materials that my 'campers'  could use to invent with.

The unique designs that came from this (from both girls and boys)  were amazing.  It reached a different type of student.  One that would not necessarily be attracted to the sensors,  motors, and alligator clips.

A few years ago I picked up some Lego Mindstorm kits and created a robotics center at Tech Savvy Girls camp.  The girls were NOT drawn to it even though it was lead by an amazing fun energetic young lady.  Reluctantly, a couple of girls agreed to be the first to give it a try.  We COULD NOT get them to stop and give the other girls a chance once they got going.  Several girls put Mindstorms on their Christmas wishlist that year.   We had a great debriefing session with the girls about their change of heart which ended up with them redesigning the LEGO box - they spiced up the font and made it more funky and colorful and added funky accessories.  I actually had the chance to give the pictures to some LEGO staff members who were visiting from Denmark at Tuft Universities STEM camp one summer.

Another experience that I'll never forget was the summer that I hired Tom Tailer to do an engineering strand for my TechSavvy Girls Leadership Camp.  Even though he was highly recommended, I really wanted a female role model for the girls.  Tom, a physics teacher from Mt. Abraham High School, turned out to be the perfect match and inspired girls to make the most amazing creative engineering projects.  When one girl imagined that the "bridge truss" she was making could be turned into a dollhouse for her younger sister, Tom pulled out colorful pieces of silk cloth she could use to finish it up with.  Another girl imagined a treehouse, and Tom came in the next day with a branch from a tree and inspired her design to completion.  


So as you equip your maker space,  make sure that there are plenty of arts and crafts materials mixed in with electronics and mechanical parts.   Remember that what pulls you in might not be what pulls others into the design cycle.  Encourage diversity in our maker space with the right stuff to attract all types of makers.


Saturday, January 18, 2014

From 3D printing assignment to fun Friday night date

How my 3D printing assignment turned into a fun Friday Night Date night in Delray

This semester I am enrolled in  a graduate class - Introduction to Physical Computing  from Marlboro College Gradaute and Professional studies.  Our assignment this week was to complete the cycle from design to printing of a 3D object.  

I already knew that I’m not very 3D spatial by nature, so I was not surprised to be challenged by this assignment.  I had tried Sketchup a few times and  always amazed at what I have seen 5th graders do with this professional level tool.  But then again I can’t hold a candle to a 5th grader at any video game that requires 3D movement. 

My husband suggested that a dice might be a good entry point for me.  Sounded good, but  I wanted something a little more creative, than the numbers 1,2,3,4,5,6 on a cube, so I came up with the idea of six inspiring words on each side of my cube.  (imagine, invent, innovate, create, make, learn).

Now inspired, I was ready to tackle the task. 

Since I am on a personal inquiry about  the role of mobile tools in the “maker movement” I thought I’d give this a try using some of the AutoDesk iOS Creativity apps that I had once downloaded on my iPad.  


Although these are amazing apps,  I was not inspired by the parts available on the 123D Design iOS app.  They all felt so mechanical and robotic, and there did not appear to be any way to add text to my cube, so I proceeded to the online version of 123D design using my computer and found that it had a feature called SmartText that allowed for text extrusion.   By sticking with a cloud based product I felt like I was still within the realm of mobile since inspired students could use this tool on ANY computer that had internet access and would not have to download software. 


Unfortunately  my lack of experience did me in.  Although I was successful in getting one of the words etched into one side of an object by pushing it down into the object and using the void feature, I eventually became frustrated at my lack of understanding of how to join objects on different planes as I tried to work with the other sides.  There was so much more to learn to get this right and every piece of new learning was taking so long.  Thus  I decided it was better to complete the ‘cycle” from design to print with something simpler than to keep building my skills in using the design software.    So I settled for a small object that had the word “imagine” etched in.  I could always come back and build my design skills later. 

On to the next step in in the process.  After exploring 2  popular sites for getting objects printed on a a 3D printer (Sculpteo and Shapeway)  I learned that as long as I could get my design in a format called STL I could upload it to those sites and order my object in a variety of colors and textures. I was even more impressed when I noticed that 123D Design (and probably many other pieces of software)  had a “Send to 3D printer” feature what connected with one or both of these online printing services. 

Who ever thought you could print such creative objects such as this spiral "pot"  or custom designed fingernails.


However I was quite surprised at how small my object had to be to stay under the $10 cap we were trying to work with. I reduced the size of my objects to about 3 cm long. 

Unfortunately the turnaround time for delivery was a little too much for my mobile lifestyle and even with expedited shipping it would arrive the day after we hit the road again.  However this constraint led me to explore makeXYZ.com where people list their 3D printers locations and offer to 3D printing
services.  I found 2 within a 20 minute drive from our campground and started a conversation with a young man named Johnny Harris in Delray.  He quoted me $10  or $15 depending on the resolution plus a small service feel.  I opted for the higher resolution and made arrangements to pick up my 3D print in a public place (hotel lobby in Delray).

I now own a  $17 red piece of plastic (3 cm long) with the word “imagine” etched in.  But heck, the experience was totally worth the cost. 

The best part of the experience was hearing Johnny’s story. He is self taught with no formal training. He  bought the 3D printer because he had an invention he wanted to make and didn’t have a way to get  a prototype.  The invention ( a vegetable peeler that peeled from all sides) is now in the patent process and this young man is now building a new fancier 3 D printer. We were quite impressed with him.  So much so that we commissioned him to model a part for our bus and print 10 of them. 
The $100 feel might seem a little more than we wanted to pay for 10 small plastic pieces, but we both liked the idea of supporting Johnny’s entrepreneurial journey - and if the material is strong enough to do the job of holding our screens in place, then perhaps Johnny will have lots of new customers from the Wander-lodge bus  owners around the country who can no longer get this part. 


It was our first time in Delray and we were quite taken by the creative economy in Delray.  We ended up walking around an Arts Garage  (seemed like an incubator building for artistic industry), a puppet theater, and a few galleries.  We ended up purchasing some fancy olive oils and vinegars and went in search of crusty breads. Lots of dessert bakeries, but no crusty bread until we hit a health food store and walked out with two different types of gluten free bread. The search for bread inspired us to stay for the evening.  We did happy hour at an Oyster bar and dinner at a Mexican place that had a large choice of tequilas , really fresh local ingredients, and wonderful service. 
Part of the street was closed off for a well attended fashion show featuring local designers and shops, which we watched for a while as we walked around town.  We finished up the evening lingering over decaf and conversation about how my 3D assignment turned into an unexpected but very fun Friday night date.



Tuesday, January 14, 2014

Physical Computing Class - Inspired but intimidated

After reading all the introductions by member of my new Maker class,  I almost dropped out, but then I remembered the advice I have given so many young women  during my 30+ years of teaching   about the 'experience gap" that women face.   Many of my female students have found themselves the only female in a class where the difference between them and other students is more than gender -  it's also the difference in experiences they have had  (or lacked) that will provide a frame of reference for all they will learn. 


  • I remembered Amber signing up for computer programming instead of the art class her guidance counselor tried to steer her in because Ms. deLaBruere told her programing was a gateway to so many opportunities;  
  • I remembered Samantha telling me that she survived her first semester as a civil engineering student in college because , thanks to Ms. deLaBruere,  she understood that she was 'not stupid' but had an experience gap with the tools they were being asked to use. 
  • I remembered  Tony, Bud, and Corey whose desire to learn how to make a web server soon was fueled by brand NEW  (local) access to the WWW - the first year that it was NOT a long distance call via CompuServe.  That year I let them "make/build" the first school web server from spare computer parts in my classroom.  I didn't know how to do it, but I knew how to encourage them and support them to find the resources they needed.   (oh and I also enrolled in Marlboro's new graduate program - Masters of Science in Internet Engineering) 
  • I remembered my first semester as a grad student at Marlboro building a Linux server, feeling like I was stumbling around in the dark all the time - but persevering and learning not how to make a Linux server - but learning 'engineering thought' and experiencing what it was like to "truly LEARN" how to learn. 

So inspired by Amber, Samantha, Tony, Bud, Corey and thousands of students that have come through my classroom,  I'm staying -- but I'm super intimidated by everyone else in the class.

My experience has mostly been to recognize the value of making and supporting others to make because of its contribution to the process of learning.  I've owned  Pico Crickets, Picoboards, a Raspbery Pi, Mindstorm,  WeDo,  conductive thread and wearable sensors (Animomagic)  along with Tinkertoys,  Legos,  Lincoln Logs, PlayDogh and have created some amazing learning environments for students using these tools.  Just as an orchestra director does not have to know how to play all the instruments in the orchestra, s/he just has to know how to encourage each player to be as good as they can be and to play together -- I was very good at understanding and encouraging my students to reach their goals and to use some of these tools to help kids learn how to learn.

Unfortunately, I packed away or gave away most of my toys/tools when I  gave up my apartment to move full time  into my home on wheels - this 1983 Bluebird bus.  (our location - where ever the bus is parked, see map on our blog.  We are heading to South by Southwest, which should be the ultimate maker experience.
http://blog.livinglearningmobile.com/
My home and office

But I'm thinking that the 'bus' will provide many opportunities to uncover the "maker" wannabe part of me and I'm in close proximity to a 'real maker' - as coach/ husband/ friend who promised to support me through this venture.  He's really good at  explaining things and letting me 'do' and not doing for me so I think this is going to be fun.

Wednesday, January 8, 2014

Moving From Coach To Maker

Every few years I make myself try something new that reaches far outside of my comfort zone.  This is the best PD ever, since it puts me in the position of the reluctant learner - the learner who is afraid, the learner who lacks the foundational skills, the learner who is convinced that they can't succeed, the learner who feels they suck at this so why do what they suck at, the learner who will need to develop different approaches to succeed,  the learner who is hard to reach for many teachers.

Some past examples have been learning to play tennis,  to swing dance, to drive a motorcycle, to program in Java.  We'll this time,  I am about to dive into the MAKER world of physical computing. I have always had a maker spirit but reserved it for making in the digital world. Mostly I have used that spirit to coach others to learn by making.  We'll this time I am moving out from behind the desk into the world of physical computing.   I have set up this blog to document the journey and my learning.

One additional twist is that I am going to add to this journey is to consider the role of mobile technology in the process of making.  What can you do or not do in the process of making with a mobile tool. Let's start with the making of this blog.  Using a mobile browser, it is 100% possible to create it on a mobile tool.  I created it using Safari on my iPad and will use a few apps to update it, including the Blogger App